Why Consider Underbelly-Pass-Through Mounting for Your RVStow Roof Rack Cargo Basket?
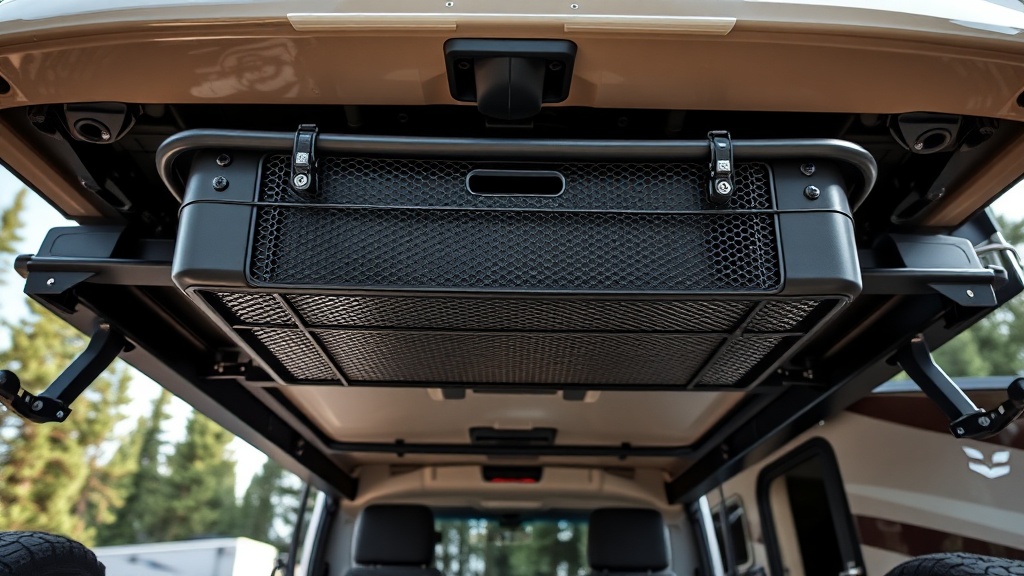
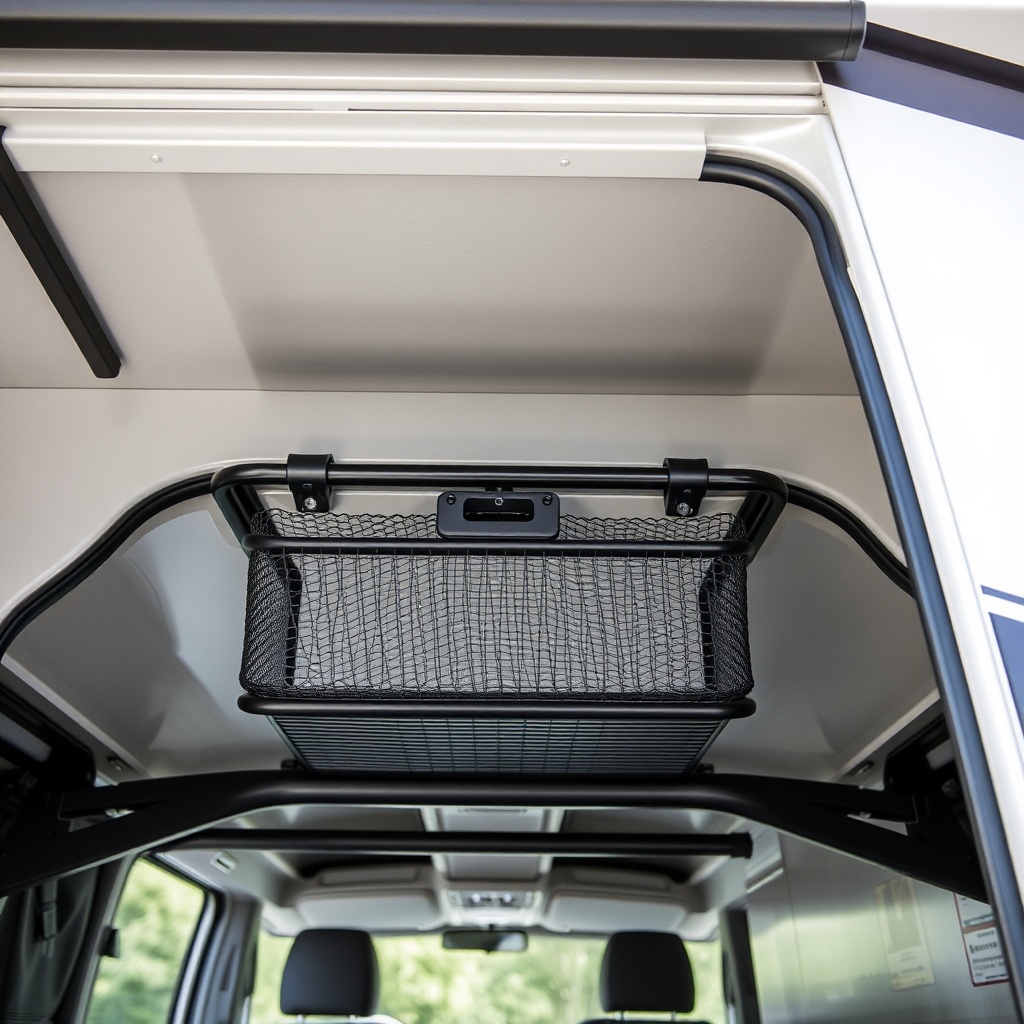
The typical roof rack cargo basket is bolted topside, but a growing number of RV owners are discovering the utility of underbelly-pass-through mounting for their RVStow Roof Rack Cargo Basket. Instead of storing gear on the roof, this approach mounts the basket beneath the vehicle’s frame, usually between the chassis rails or behind the rear axle, allowing for a low-profile storage area that doesn’t affect roof aerodynamics or solar panel placement. For RVers with limited roof space or those who tow a trailer, this alternative storage solution offers secure, accessible, and weather-protected cargo capacity without the need for a roof ladder or wind deflector.
This article explores the technical and practical aspects of underbelly-pass-through mounting for the RVStow Roof Rack Cargo Basket, including weight limits, installation steps, vehicle compatibility, and real-world owner feedback. We’ll also compare this method to traditional roof mounting and provide specific data to help you decide if it’s right for your rig.
What Is Underbelly-Pass-Through Mounting for an RVStow Roof Rack Cargo Basket?
Underbelly-pass-through mounting involves attaching the RVStow Roof Rack Cargo Basket to the underside of a motorhome, fifth-wheel, or travel trailer, typically through the chassis frame. The basket is positioned so that it can be accessed from the side or rear of the vehicle, passing through the underbelly cavity between the frame rails. This method is ideal for storing items like recovery gear, propane tanks, water hoses, leveling blocks, or extra tools—anything that doesn’t need frequent access but must be kept secure and out of the elements.
The key advantage here is that the basket remains below the vehicle’s main storage compartment floor, reducing the center of gravity and keeping deck space free for solar panels or an Aerodynamic Fairing Installation for RVStow Roof Rack Cargo Basket: Reduce Drag & Noise if you later decide to mount it topside. However, mounting under the belly requires careful planning around ground clearance, exhaust routing, and heat shielding.
What Are the Weight Limits and Clearance Specifications for Underbelly Mounting?
The RVStow Roof Rack Cargo Basket is rated for a maximum dynamic load of 150 kg (330 lbs) when mounted on a roof, but underbelly-pass-through applications reduce this to 100 kg (220 lbs) due to the different stress points on the mounting brackets and chassis rail attachment points. This conservative limit accounts for off-road vibration, ice buildup, and the potential for debris impact.
| Parameter | Roof Mount (OEM) | Underbelly-Pass-Through Mount |
|---|---|---|
| Maximum dynamic load (kg) | 150 kg | 100 kg |
| Maximum dynamic load (lbs) | 330 lbs | 220 lbs |
| Recommended ground clearance reduction | N/A | 15–20 cm (6–8 inches) |
| Basket dimensions (L x W x H) | 122 x 91 x 15 cm (48 x 36 x 6 in) | 122 x 91 x 15 cm (48 x 36 x 6 in) |
| Mounting hardware | Crossbars + brackets | Chassis rail U-bolts + adapter plate |
| Heat shield requirement | No | Yes (near exhaust) |
Note that the 100 kg limit is only achievable if the basket is mounted within 1.5 meters of the rear axle and the chassis rails are rated for at least 150 kg additional point load. Exceeding this can cause frame damage or void your vehicle warranty.
For owners who want to maximize load capacity while minimizing drag, consider pairing this mount with the RVStow Roof Rack Cargo Basket DIY Lightweight Mod: Cut Weight Without Sacrificing Storage to reduce basket weight by up to 30% without sacrificing structural integrity.
How Do You Install the RVStow Roof Rack Cargo Basket Under the Belly?
Installing the RVStow Roof Rack Cargo Basket underbelly-pass-through requires a few specialized steps, but the process is manageable for a DIYer with basic fabrication skills. Here’s a condensed walkthrough:
- Step 1: Vehicle inspection – Locate the chassis rails (typically C-channel or box section). Measure the distance between rails: the basket’s 91 cm width needs at least 100 cm of clearance. Check for exhaust pipes, fuel lines, and heat shields that could interfere.
- Step 2: Purchase an underbelly adapter kit – RVStow sells a specific adapter kit (part no. UB-100) for $149.99 USD / £119.99 GBP / €139.99 EUR. It includes four U-bolts, rubber isolator pads, and two steel crossbars.
- Step 3: Position the basket – Temporarily hold the basket in place between the rails, ensuring it’s centered and level. The bottom of the basket should be at least 15 cm (6 inches) above your lowest chassis component (e.g., exhaust) to avoid dragging.
- Step 4: Attach crossbars – Bolt the two steel crossbars to the chassis rails using the U-bolts and isolator pads. Torque to 30 Nm (22 ft-lbs).
- Step 5: Mount the basket – Place the basket onto the crossbars and secure with the included stainless steel hardware. Use Loctite on all threads.
- Step 6: Install heat shields – If the basket is within 30 cm of the exhaust, install an aluminum heat shield (sold separately for $39.99 USD) to prevent melting plastic items.

After installation, test drive at low speeds and check for clearance over bumps. You may need to adjust the basket fore/aft to avoid suspension travel interference. For enhanced security, pair this installation with the RVStow Roof Rack Cargo Basket Lock Security Upgrade to prevent theft.
What Are the Pros and Cons of Underbelly vs. Roof Mounting?
Choosing between underbelly-pass-through and roof mounting hinges on your specific RV setup. Below is a comparison to help you decide.
- Pro: Lower center of gravity – Underbelly mounting keeps heavy gear below the vehicle’s waistline, reducing body roll and improving handling, especially on uneven terrain.
- Pro: No roof access required – No need for a ladder or climbing onto your RV roof, which is safer for seniors or those with mobility issues.
- Pro: Preserves roof space – Keeps the roof clear for solar panels, skylights, or an RVStow Roof Rack Cargo Basket Solar Panel Mounting Compatibility setup.
- Con: Reduced ground clearance – Even with careful positioning, you lose 15–20 cm of clearance, which can be problematic on rocky trails or deep snow.
- Con: Exposure to road debris – The basket is more vulnerable to mud, salt spray, and gravel impacts. Owners in winter climates often invest in a corrosion-resistant coating. See RVStow Roof Rack Cargo Basket Corrosion Resistance & Salt Spray Test for data on how the basket holds up.
- Con: Heat management – Proximity to exhaust requires heat shielding, adding complexity and cost.
For most RVers, underbelly mounting works best for short, heavy items (like recovery tracks or camping tools) that don’t exceed 100 kg. Lighter, bulkier gear (like chairs or awnings) is better suited for a roof-mounted basket with an aerodynamic fairing.
What Do Owners Say About the RVStow Roof Rack Cargo Basket Underbelly Mount?
Feedback from RV owners who have adopted the underbelly-pass-through method is mostly positive, but with caveats about clearance. Here’s a summary of common comments from forums and product reviews:
- Praise for stability: “After switching from roof to underbelly, my RV feels much less top-heavy. I carry two 20lb propane tanks and a set of leveling blocks without issues.” – Mark in Colorado
- Concerns about ground clearance: “I lost almost 7 inches of clearance under the rear axle. I can’t go over curbs or dirt roads without scraping. It’s fine for pavement camping, but not for boondocking.” – Linda in Florida
- Praise for ease of access: “I can grab my tools without unpacking the entire storage bay. The basket sits right under the door, so I just reach down.” – Tom in Oregon
- Critique of installation complexity: “The U-bolt holes didn’t align perfectly with my chassis rails. I had to drill new holes and use longer bolts. Took an extra hour.” – Dave in California
- Positive on corrosion: “Two winters in Michigan, the basket still looks new after a hose-down. The powder coat seems to hold up better than my old Thule.” – Karen in Michigan
Owners also recommend pairing the underbelly mount with a wind deflector if you later decide to roof-mount the basket, as the same brackets can be reused.
Frequently Asked Questions
Can I mount the RVStow Roof Rack Cargo Basket under a fifth wheel or travel trailer?
Yes, but only if the trailer has a full box frame with at least 100 cm of clear space between the rails. Many travel trailers have too narrow a frame or too many crossmembers. Always measure first and ensure the basket doesn’t interfere with the landing gear or sewer lines.
Will the underbelly mount void my RV warranty?
Most manufacturers state that drilling into the chassis or adding aftermarket attachments can void the frame warranty. Check your owner’s manual or consult your dealer. Using bolt-on U-bolts that don’t require drilling minimizes risk, but you assume liability.
How do I keep items dry in an underbelly-mounted basket?
The basket has an open wire mesh floor, so water drains. For weather-sensitive items, use a waterproof cargo bag or a plastic bin with a lid. Avoid storing loose items that could fall out during driving.
Can I install the basket under a Class B motorhome?
Class B vans have limited chassis space and often lack the necessary frame clearance. Most installations are done on Class A or C motorhomes with full frame rails. For Class B, consider a hitch-mounted cargo carrier instead.
Does the basket come with the underbelly adapter kit?
No, the underbelly adapter kit (UB-100) is sold separately for $149.99 USD / £119.99 GBP / €139.99 EUR. The basket itself includes only roof mounting hardware. Order the adapter kit at purchase if you plan to go underbelly.
How does the underbelly mount handle winter road salt?
The basket is constructed from electro-coated steel with a powder coat finish. Refer to the RVStow Roof Rack Cargo Basket Corrosion Resistance & Salt Spray Test for detailed results: after 200 hours of salt spray testing, the basket showed only minor surface rust at weld points. Regular rinsing with fresh water after winter trips is recommended.