Why Install a Light Bar on Your RVStow Roof Rack Cargo Basket?
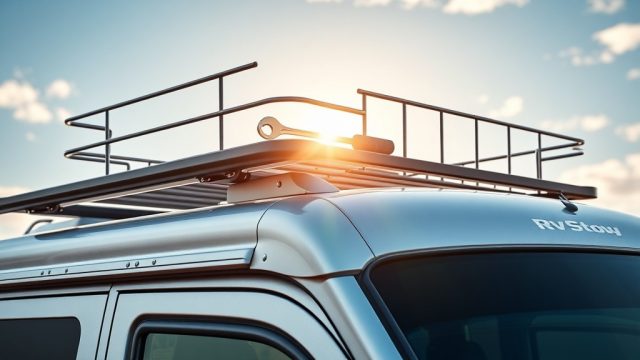
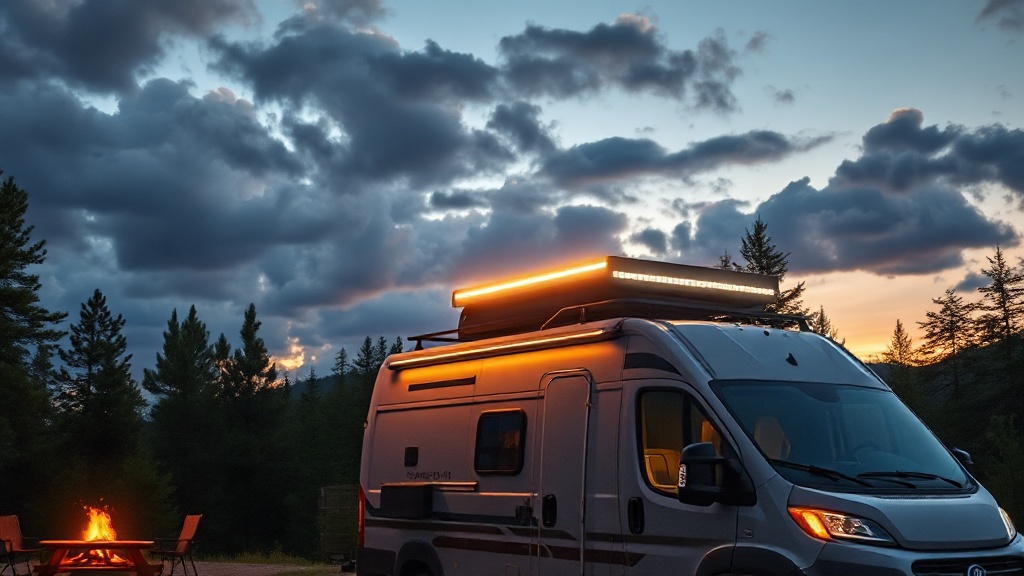
Adding a light bar to your RVStow Roof Rack Cargo Basket transforms your RV from a simple hauler into a self-sufficient campsite command center. Whether you’re setting up after dark, navigating a poorly lit campground, or simply want to extend your outdoor living hours, a light bar mounted on the cargo basket provides directed, high-output illumination without cluttering your RV’s exterior. This guide details the mod, covering everything from compatibility to wiring and real-world owner feedback.
By integrating a light bar with your basket, you gain a sturdy, elevated mounting point that keeps beams above roofline obstructions. For those who also want to secure gear during transit, consider pairing this mod with the RVStow Roof Rack Cargo Basket Cargo Net Safety Mod: Prevent Load Shift to ensure nothing shifts into the light bar’s path.
What Tools and Materials Do You Need?
Before starting, gather the following tools and components. Prices reflect typical retail in the US as of early 2025.
| Item | Quantity | Estimated Cost (USD) | Notes |
|---|---|---|---|
| LED light bar (curved or straight, 12–24 inch) | 1 | $40–$120 | Choose flood/spot combo for campsite use |
| Heavy-duty L-brackets (stainless steel) | 2–4 | $8–$15 | Match basket tube diameter (typically 1 inch) |
| Stainless steel bolts, nuts, lock washers | 4–8 sets | $5–$10 | Use 1/4-20 or 5/16-inch |
| Weatherproof wire harness with relay and switch | 1 | $25–$50 | Pre-wired kits simplify installation |
| Wire loom or heat-shrink tubing | 3–5 feet | $5–$8 | Protect wiring from UV and abrasion |
| Multimeter | 1 | $15–$25 | For testing connections |
| Drill with metal drill bits | 1 | N/A (if already owned) | If mounting to basket rails |
| Rubber grommets | 2–4 | $2–$4 | For wire pass-through holes |
| Zip ties (UV-resistant) | 10 | $3 | Secure wiring along basket |
How Do You Choose the Right Light Bar for the Basket?
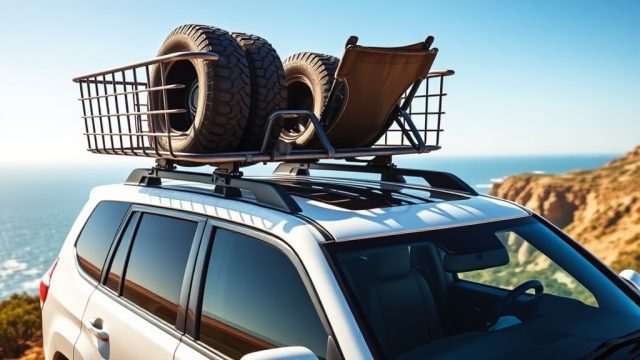
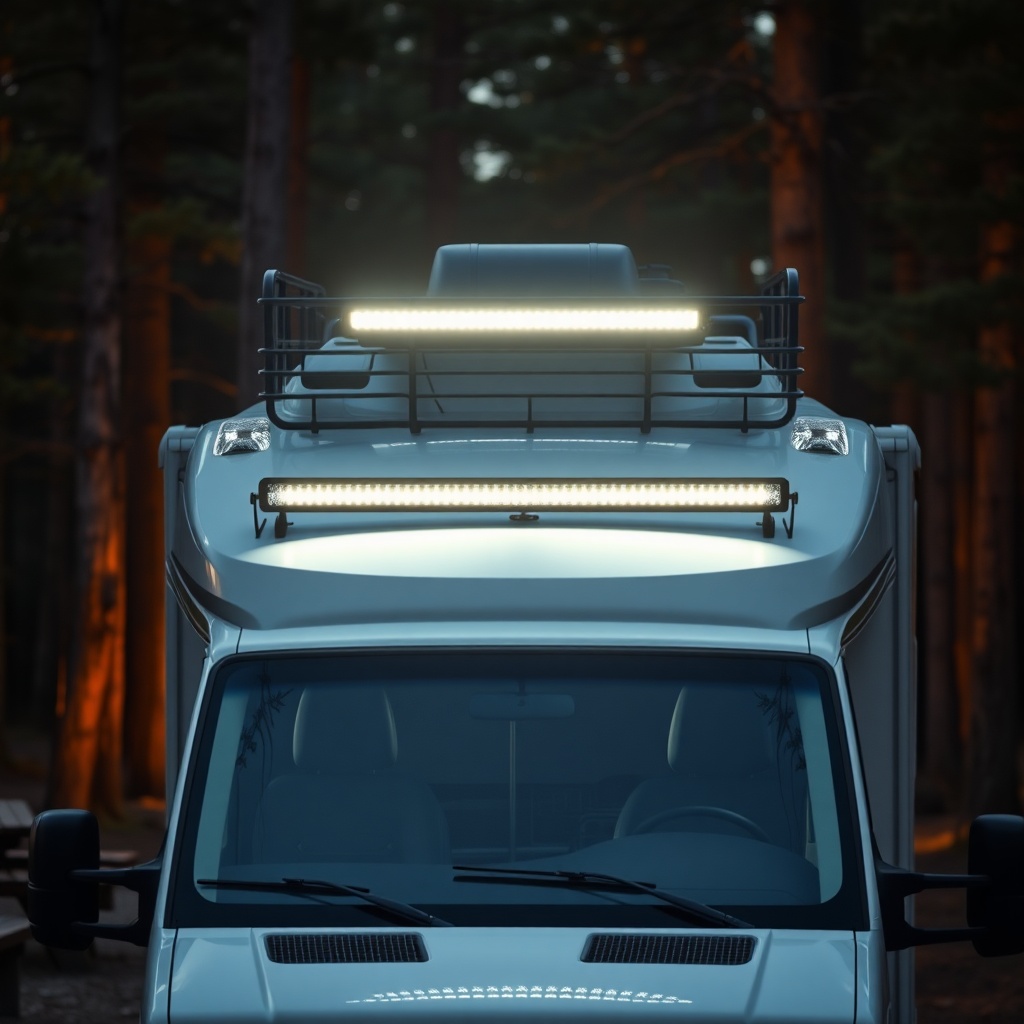
Selecting a light bar for your RVStow Roof Rack Cargo Basket requires balancing beam pattern, size, and durability. For campsite illumination, a combination beam (spot + flood) provides both distance and wide peripheral light. Avoid overly large bars (over 30 inches) that overhang the basket’s sides, as they can interfere with roof clearance or aerodynamic drag.
- Size range: 12–24 inches is ideal for most RVStow baskets (standard width: 36–48 inches). Mount the bar across the front or rear crossbar.
- Light type: Choose a light bar with a polycarbonate lens and aluminum housing (IP67 or higher) to withstand rain, snow, and road debris.
- Wattage: 120–240 watts provides ample light for a typical campsite. Higher wattage may require a dedicated relay and thicker gauge wire.
If you plan to use your basket for winter camping, the RVStow Roof Rack Cargo Basket Winterization Cover: Protect Your Gear from Snow & Ice can shield both gear and light bar wiring from ice buildup.
What Is the Step-by-Step Installation Process?
Step 1: Mount the Light Bar to the Basket
Attach the L-brackets to the underside of the basket’s front or rear crossbar. Use stainless steel bolts to secure the light bar’s mounting feet to the brackets. Tighten evenly to avoid twisting the bar. Ensure the bar sits flush and does not contact the basket when the vehicle rocks.
Step 2: Run the Wiring
Route the wire harness from the light bar along the basket’s underside, using zip ties to secure it every 8–10 inches. Feed the wire through a rubber grommet where it enters the RV’s roof or along the windshield cowl. Avoid sharp edges and moving parts (e.g., sunroof, antenna).
Step 3: Connect to Power
Connect the harness’s red wire to the battery’s positive terminal via a fuse (10–20 amp recommended). Ground the black wire to a chassis bolt. For most RVs, tap into the parking light or an auxiliary switch circuit (refer to your RV’s manual). Use a multimeter to verify voltage before final connection.
Step 4: Install the Switch
Mount the rocker switch in a convenient interior location (e.g., driver’s side dashboard or overhead console). For RVs with a factory accessory switch panel, use an empty slot for a clean look.

What Are the Pros and Cons of This Mod?
| Pros | Cons |
|---|---|
| Elevated mounting keeps beam above roof clutter and reduces glare. | May require drilling into the basket or RV roof (use sealant to prevent leaks). |
| Frees up bumper or front-grille space for other accessories. | Adds weight (2–5 lbs) to the roof load; check your RV’s weight capacity. |
| Directs light downward for safe campsite navigation. | Wind noise can increase if the bar protrudes above the basket’s edge. |
| Works as a second backup light when wired to reverse circuit. | Legal restrictions on auxiliary lights in some states or provinces (check local laws). |
| Integrates with existing cargo basket tie-downs (see RVStow Roof Rack Cargo Basket Tie-Down Points Mod: Secure Your Load). | Requires basic wiring knowledge; incorrect installation may drain the battery. |
What Owners Say About the RVStow Light Bar Mod
Owners who installed a light bar on their RVStow Roof Rack Cargo Basket report significant improvements in campsite convenience. Mike from Colorado shared, “We did a 3-week trip through the Rockies. The light bar made setting up after dark a breeze—no more stumbling with headlamps. I mounted it on the front crossbar, and it created a 30-foot blanket of light.”
Sarah, a full-time RVer from Florida, noted: “I used the bolt holes already on the basket for mounting—didn’t need to drill. The hardest part was hiding the wires along the roof. I used the RVStow Roof Rack Cargo Basket Ladder Mount Mod: Access Your Gear from Ground Level to reach the basket easily, and the light bar now doubles as a work light for the ladder area.”
However, some caution about glare. David from Utah said, “If you mount the bar too high, light reflects off the hood. I lowered it by using shorter brackets, and now it’s perfect. Pair it with the RVStow Roof Rack Cargo Basket Cargo Net Replacement Mod: Upgrade to Heavy-Duty Mesh to keep smaller gear from blocking the light output.”
For those who carry bikes, the RVStow Roof Rack Cargo Basket Bike Mount Mod: Transport Bikes Securely is another popular addition that doesn’t interfere with the light bar’s position.
Frequently Asked Questions
- Can I mount the light bar on the underside of the basket?
Yes, but it reduces clearance from the roof. Most owners prefer mounting along the front or rear crossbar for maximum light projection without shading from basket contents. - Will a light bar affect my RV’s wind drag?
Minimally, especially if the bar is less than 24 inches and mounted behind the roofline. Aerodynamic curved bars produce less noise than boxy styles. - Do I need a relay for a 120-watt light bar?
Yes. A relay prevents high current from damaging your RV’s switch. Most pre-wired harnesses include a 40-amp relay; ensure it’s rated for your light’s wattage. - How do I keep water out of the wiring connection?
Use dielectric grease on connectors and wrap with self-fusing silicone tape or heat-shrink tubing. Ensure the grommet at the roof entry is sealed with RV-grade sealant. - What if my basket already has a cargo net?
The net can be removed or cut around the light bar mounting. Alternatively, replace the net with the RVStow Roof Rack Cargo Basket Cargo Net Replacement Mod: Upgrade to Heavy-Duty Mesh, which has cutouts for accessories. - Is this mod legal for on-road use?
Auxiliary lights must be covered or turned off on public roads in most states. Use a switch that disconnects the light bar when driving. Off-road and campsite use is generally unrestricted.